hz322 manual

HZ322 Manual: Comprehensive Guide
This guide details the Honeywell HZ322 TrueZONE panel installation, configuration, operation, and troubleshooting for both conventional and heat pump systems.
The Honeywell HZ322 TrueZONE panel is a central control unit designed for zoned heating and cooling systems. It manages temperature control across up to three independent zones, optimizing comfort and energy efficiency. This panel supports both conventional forced-air systems – gas, oil, or electric with up to two stages of heating and cooling – and single-stage heat pump systems with auxiliary heat.
Featuring an intuitive installer setup process, the HZ322 utilizes a digital display with clear, straightforward language to guide professionals through configuration. Robust push terminals and common-sense LEDs simplify installation and troubleshooting. The HZ322 TrueZONE kit typically includes the panel itself, an AT140 transformer, and a C7735A Discharge Air Temperature Sensor (DATS).
Overview of TrueZONE System Capabilities
The TrueZONE system, powered by the HZ322 panel, delivers precise temperature control to individual zones within a building. This capability enhances comfort by allowing occupants to customize heating and cooling based on their specific needs and preferences. Beyond comfort, zoning significantly improves energy efficiency by directing heating or cooling only to occupied areas, reducing wasted energy.
The system accommodates both wired and wireless thermostats (with an optional wireless adapter), offering flexibility in installation. It’s designed for applications with up to three zones, making it suitable for a range of residential and light commercial settings. The HZ322’s intuitive setup and diagnostic features streamline installation and maintenance, ensuring reliable performance.

Installation Procedures
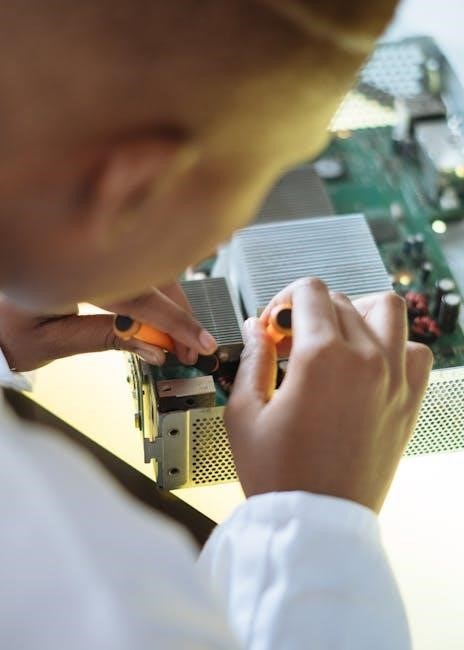
Proper installation involves mounting the HZ322 panel, completing necessary wiring for your system type, and installing the transformer and DATS sensor.
Mounting the HZ322 Panel
Securely mounting the HZ322 TrueZONE panel is a crucial first step in the installation process. The panel should be located near the HVAC equipment, ideally on a wall, stud, roof truss, or even a cold-air return.
While the HZ322 offers mounting flexibility and can be installed in any orientation, leveling it is recommended for aesthetic purposes. It’s important to ensure the location allows easy access for future maintenance and troubleshooting.
Consider proximity to power sources for the transformer and ensure adequate space for wiring connections. The panel’s robust push terminals require sufficient clearance for comfortable and secure wiring.
Optimal Location for Panel Placement
Selecting the right location for your HZ322 TrueZONE panel is vital for efficient operation and ease of service. Prioritize proximity to the HVAC equipment – this minimizes wiring runs and potential signal interference. Mounting on a wall, sturdy stud, or roof truss provides a stable base.
A cold-air return location is also acceptable, but ensure it’s protected from excessive moisture or temperature fluctuations. Avoid areas with obstructions that could hinder airflow or access for maintenance.
Consider future accessibility when choosing a spot; you may need to access the panel for troubleshooting or adjustments.
Mounting Orientation Considerations
The HZ322 TrueZONE panel offers remarkable flexibility in mounting orientation; Unlike some systems, it doesn’t require a specific upright or horizontal position for functional operation. You can mount it in any orientation that best suits your installation space and wiring needs.
However, while functionality isn’t affected, consider aesthetics. Leveling the panel during installation will provide a cleaner, more professional appearance.
Ensure the mounting surface is secure and can support the panel’s weight. Proper mounting prevents vibrations and potential damage to internal components, ensuring long-term reliability.
Wiring Diagrams
Proper wiring is crucial for the correct operation of the HZ322 TrueZONE panel. This section provides essential wiring information for both conventional systems – encompassing gas, oil, and electric forced-air setups – and heat pump systems.
For conventional systems, carefully follow the diagrams to connect the appropriate wires for heating and cooling stages. Heat pump wiring differs, requiring specific connections for the compressor and auxiliary heat.
Always ensure power is disconnected before commencing any wiring work. Double-check all connections for tightness and accuracy to prevent malfunctions and ensure system safety.
Wiring for Conventional Systems (Gas, Oil, Electric)
When wiring the HZ322 for conventional gas, oil, or electric forced-air systems, adhere strictly to the provided diagrams. These systems typically utilize up to two stages of heating and cooling.
Connect the R wire (24VAC power) and the common wire (C) to the designated terminals on the panel. Heating wires (W1, W2) and cooling wires (Y1, Y2) should be connected according to the system’s staging configuration.
Ensure proper wire gauge and secure connections. Incorrect wiring can lead to system inefficiencies or damage. Always verify the wiring against the specific system requirements before energizing the panel.
Wiring for Heat Pump Systems
For heat pump systems utilizing a single-stage compressor and auxiliary heat, specific wiring configurations are required for the HZ322 panel. The O/B wire, controlling reversing valve operation, must be correctly connected to designate heating or cooling mode.
Auxiliary heat wiring (AUX or E) connects to the appropriate terminal, enabling supplemental heating during colder temperatures. The Y wire controls the compressor, and the W wire activates auxiliary heat when needed.
Double-check the wiring diagram for heat pump applications to ensure proper functionality and prevent system malfunctions. Secure connections and correct wire gauge are crucial for optimal performance.
Transformer Installation (AT140)
The AT140 transformer is a critical component, providing the necessary 24VAC power to the HZ322 TrueZONE panel and connected thermostats. Ensure the power to the HVAC system is completely disconnected before commencing transformer installation.
Mount the AT140 transformer securely near the HVAC equipment, adhering to all local electrical codes. Connect the 120VAC input wires, observing proper polarity. The 24VAC output wires connect to the designated terminals on the HZ322 panel.
Verify correct voltage output with a multimeter before connecting to the panel, ensuring it falls within the specified range. A properly installed transformer is essential for reliable system operation.
Discharge Air Temperature Sensor (DATS) ⎻ C7735A
The C7735A Discharge Air Temperature Sensor (DATS) is vital for protecting the HVAC system from low airflow conditions, preventing coil freeze-up. Install the sensor in the return air duct, as close to the evaporator coil as possible, ensuring accurate temperature readings.
Secure the DATS with appropriate hardware, avoiding direct contact with the duct wall. Connect the sensor wires to the designated terminals on the HZ322 panel, observing correct polarity.
Proper DATS placement and wiring are crucial for system safety and efficiency. The panel utilizes this sensor to disable cooling if airflow is insufficient.
Configuration and Setup
The HZ322 features an intuitive installer setup process, guiding users through four easy steps with clear, real-language instructions on the digital display.
Intuitive Installer Setup Process
The Honeywell HZ322 TrueZONE panel boasts a remarkably user-friendly installation experience. Its intuitive setup process utilizes a clear digital display, eliminating complex procedures and guesswork.
Instead of cryptic codes, the display guides installers with straightforward, real-language prompts, walking them through four essential steps. This simplifies configuration for both conventional (gas, oil, electric) and heat pump systems.
The step-by-step guidance ensures accurate system type selection and proper zone configuration – supporting up to three zones. This streamlined approach minimizes installation time and reduces the potential for errors, resulting in a reliably functioning TrueZONE system.
Step-by-Step Digital Display Guidance
The HZ322’s digital display provides clear, concise instructions throughout the setup process. The first step typically involves confirming the system type – conventional or heat pump – based on the existing HVAC equipment.
Next, the display prompts for zone configuration, allowing the installer to define the number of zones (up to three) and assign thermostats accordingly. Subsequent steps focus on verifying wiring connections and confirming operational parameters.
Each step features simple prompts and visual cues, ensuring even inexperienced installers can navigate the process with confidence. The display also provides feedback on successful completion of each stage, minimizing errors and streamlining the overall setup.
Zone Configuration (Up to 3 Zones)
The HZ322 TrueZONE panel supports up to three independently controlled zones, enhancing comfort and energy efficiency. During setup, the installer defines the number of zones based on the home’s layout and thermostat placement. Each zone represents a distinct area with its own temperature settings.
The system accommodates both wired and wireless thermostats, with an optional wireless adapter available for wireless configurations. Proper zone configuration ensures optimal performance and allows for customized heating and cooling schedules for each area.
Accurate zone assignment is crucial for maximizing the benefits of the TrueZONE system, delivering personalized comfort and reducing energy waste.
System Type Selection (Conventional vs. Heat Pump)
The HZ322 TrueZONE panel requires the installer to specify the heating and cooling system type during the initial setup process. Options include conventional systems – gas, oil, or electric forced-air – and heat pump systems with single-stage compressors and auxiliary heat.
Correct system type selection is critical for proper operation and ensures the panel controls the HVAC equipment appropriately. The intuitive installer setup guides users through this step, utilizing clear language and a digital display.
Choosing the wrong system type can lead to inefficient operation or system malfunction.
Panel Operation and Indicators
The HZ322 panel utilizes an LED display to clearly communicate both system and zone status, providing essential operational feedback to the user.
Understanding the LED Display
The HZ322 TrueZONE panel features a user-friendly LED display designed to provide clear and concise information regarding system and zone operation. This display serves as a primary communication tool, offering quick insights into the panel’s status without requiring complex diagnostics. Much of this crucial information is conveniently listed on a label located on the inside of the HZ322 cover, ensuring easy access for installers and technicians.
For users who prefer alternative language options, French or Spanish labels are readily available in form 69-2199FS. The LEDs themselves are designed to be intuitive, indicating system status and individual zone conditions at a glance. These common-sense LEDs simplify troubleshooting and ensure efficient system monitoring, contributing to a smoother installation and maintenance experience.
LED Indicators for System Status
The HZ322 TrueZONE panel utilizes specific LED indicators to communicate the overall system’s operational status. These indicators provide immediate feedback on whether the system is actively heating, cooling, or is in an idle state. Understanding these signals is crucial for quick system assessment and troubleshooting. The panel’s design prioritizes clear communication, ensuring that installers and technicians can easily interpret the LED display.
These LEDs offer a visual representation of the system’s current activity, allowing for efficient monitoring and diagnosis. The intuitive nature of these indicators simplifies the process of identifying potential issues, reducing downtime and ensuring optimal system performance. Refer to the label inside the panel cover for a detailed explanation of each LED’s meaning.
LED Indicators for Zone Status
The HZ322 TrueZONE panel employs dedicated LED indicators to display the status of each individual zone within the system. These LEDs clearly show whether a zone is currently calling for heat or cool, is actively heating or cooling, or is in an off state. This granular level of detail allows for precise zone-specific troubleshooting and ensures optimal comfort control throughout the building.
The zone status LEDs provide a quick visual assessment of each zone’s operational condition, simplifying diagnostics and maintenance. Technicians can immediately identify zones that are not responding as expected, enabling targeted repairs and minimizing disruption. The panel’s intuitive design makes interpreting these indicators straightforward, even for those unfamiliar with the system.

Advanced Configuration
Accessing advanced settings allows customization of system parameters, offering fine-tuned control beyond basic setup for optimal performance and specific application needs.
Accessing Advanced Settings
To enter the advanced configuration menu on the HZ322 TrueZONE panel, a specific sequence must be followed during the initial setup or after a reset. This typically involves pressing and holding a combination of buttons – often the ‘Menu’ and ‘Down’ arrows simultaneously – for a designated duration, usually around five seconds.
The display will then transition from the standard operating screen to a menu presenting options like cycle rate adjustments, minimum on/off times, and temperature offset calibration. Carefully navigate through these options using the ‘Up’ and ‘Down’ arrow buttons, and confirm selections with the ‘Enter’ or ‘Menu’ button.
Remember to document any changes made within the advanced settings, as incorrect adjustments can impact system performance. Refer to the complete manual for detailed explanations of each parameter.
Adjusting System Parameters
Within the advanced settings, the HZ322 allows fine-tuning of several key system parameters to optimize performance and comfort. Cycle rate adjustments control how frequently the heating or cooling system turns on and off, impacting temperature stability and energy consumption. Minimum on/off times prevent short-cycling, extending equipment lifespan.
Temperature offsets enable calibration to account for thermostat placement or individual preferences. For heat pump systems, adjustments to auxiliary heat settings can balance cost-effectiveness with comfort during extreme temperatures.
Carefully consider the impact of each parameter before modification. Incorrect settings can lead to inefficient operation or discomfort. Always consult the full manual for detailed explanations and recommended values.

Troubleshooting
This section provides solutions for common issues, including checking wiring connections and interpreting LED indicators to diagnose system malfunctions effectively.
Common Issues and Solutions
Addressing typical problems with the HZ322 TrueZONE panel is crucial for efficient operation. A frequent issue involves incorrect wiring; carefully review the wiring diagrams for your specific system type – conventional (gas, oil, electric) or heat pump.
If the system fails to respond, verify the transformer (AT140) is correctly installed and providing power. Check the LED indicators; a flashing LED often signals a specific fault, referencing the panel’s internal label or this manual for interpretation.
Zone issues can stem from thermostat problems or wiring discrepancies; Ensure thermostats are compatible and properly connected. For heat pump systems, confirm auxiliary heat settings are appropriate. If problems persist, consult Honeywell support for further assistance.
Checking Wiring Connections
Thoroughly inspect all wiring connections within the HZ322 TrueZONE panel to ensure secure and accurate placement. Verify each wire corresponds to the correct terminal, referencing the appropriate wiring diagram for conventional or heat pump systems.
Pay close attention to the robust push terminals, ensuring wires are fully inserted and locked in place. Loose connections can cause intermittent operation or complete system failure.
Double-check the wiring for the Discharge Air Temperature Sensor (DATS ー C7735A) and the transformer (AT140). Confirm polarity is correct where applicable. A systematic check of all connections is vital for proper system functionality and troubleshooting.

Specifications and Accessories
The HZ322 panel is a 2H/2C model, compatible with up to three zones, and utilizes accessories like the AT140 transformer and C7735A DATS.
HZ322 Panel Specifications (2H/2C)
The Honeywell HZ322 TrueZONE Panel, designated as a 2H/2C model, is designed for versatile HVAC control. It supports conventional forced-air systems – gas, oil, or electric – with up to two stages of heating and cooling. Furthermore, it’s fully compatible with single-stage compressor heat pump systems featuring auxiliary heat.
This panel manages two or three independent forced-air zones, utilizing either wired thermostats or, with an optional adapter, wireless thermostats. Robust push terminals ensure secure wiring connections, and the system incorporates common-sense LEDs for easy status monitoring. The HZ322’s intuitive installer setup simplifies configuration, guiding users through a four-step process with clear, understandable language displayed digitally.
It’s a complete zoning solution when paired with the AT140 transformer and C7735A Discharge Air Temperature Sensor (DATS), as found in the HZ322K kit.
Compatible Accessories
To maximize the functionality of your Honeywell HZ322 TrueZONE system, several compatible accessories are available. The AT140 Transformer is essential for providing reliable power to the panel, and is often included in starter kits like the HZ322K. Accurate temperature readings are ensured by the C7735A Discharge Air Temperature Sensor (DATS), crucial for efficient zone control and preventing system imbalances.
For wireless zoning options, a dedicated Wireless Adapter allows integration with Honeywell’s wireless thermostat range, expanding system flexibility. Consider utilizing Honeywell’s range of wired thermostats designed for TrueZONE compatibility, offering precise temperature control within each zone. Ensure all accessories are properly installed for optimal performance and system longevity.

Warranty Information
Honeywell provides warranty details and coverage for the HZ322 TrueZONE panel; contact Honeywell Support for specific terms and assistance with claims.
Warranty Details and Coverage
The Honeywell HZ322 TrueZONE panel is covered by a limited warranty, protecting against defects in materials and workmanship from the date of purchase. This warranty typically covers component failures under normal use and service, ensuring the panel functions as designed. However, the warranty does not cover damage resulting from improper installation, misuse, abuse, or unauthorized modifications.

Specifically, the warranty excludes issues caused by incorrect wiring, power surges, or failure to follow the installation instructions outlined in this manual. To obtain warranty service, proof of purchase is required. Contacting Honeywell Support initiates the claim process, and they will guide you through troubleshooting and potential repair or replacement options. The duration of the warranty varies, so refer to the official warranty documentation for precise details.
Contacting Honeywell Support
For assistance with your Honeywell HZ322 TrueZONE panel, comprehensive support resources are readily available. Honeywell provides multiple channels for reaching their support team, including a dedicated phone line and an extensive online knowledge base. The official Honeywell Home website offers FAQs, troubleshooting guides, and downloadable manuals, often addressing common issues.
When contacting support, have your model number (HZ322) and date of purchase readily available to expedite the process. Detailed descriptions of the problem, including any error messages or unusual behavior, are also helpful. Support representatives can assist with installation questions, configuration challenges, and warranty claims. Explore the Honeywell website for the most up-to-date contact information and support options.


Leave a Reply
You must be logged in to post a comment.