10 yard zero target pdf

The 10-yard zero target is a practical tool for sighting rifles, ensuring accuracy up to 200 yards. Its popularity stems from effectiveness in various shooting scenarios and availability as a downloadable PDF for easy printing and use.
1.1 What is the 10 Yard Zero Target?
The 10-yard zero target is a specialized tool designed to help shooters accurately zero their optics or iron sights at a shorter distance. It typically features a grid system and alignment points that simplify the zeroing process. Available as a downloadable PDF, this target allows users to print and set up at 10 yards, enabling precise adjustments for optimal accuracy at longer distances, such as 50 or 200 yards, depending on the specific design and calibration.
1.2 Importance of Zeroing at 10 Yards
Zeroing at 10 yards is crucial for establishing a consistent and accurate foundation for shooting. It allows shooters to fine-tune their optics or iron sights efficiently, ensuring reliability at longer distances. This shorter range reduces ammunition consumption and saves time, making it ideal for practice and preparation. A proper 10-yard zero provides a solid baseline for engaging targets effectively up to 200 yards, enhancing overall shooting performance and confidence in various scenarios.
Understanding the 10 Yard Zero
The 10-yard zero is a practical method for sighting in rifles, ensuring accuracy at longer distances. It simplifies the zeroing process, making it efficient and effective for shooters.
2.1 The Concept of Zeroing at 10 Yards
Zeroing at 10 yards is a method to align a rifle’s point of aim (POA) with its point of impact (POI). This close-range adjustment simplifies the sighting-in process, ensuring accuracy at longer distances. By using a 10-yard zero target, shooters can achieve a consistent and reliable setup, making it easier to engage targets effectively up to 200 yards. The concept leverages ballistic principles to minimize adjustments, providing a practical solution for both beginners and experienced shooters.
2.2 Ballistic Implications of a 10 Yard Zero
A 10-yard zero ensures consistent bullet trajectory alignment, minimizing adjustments for longer ranges. Ballistic calculations show negligible difference between 10-yard and 25-yard zeros, with less than an inch variation in impact. This setup optimizes accuracy up to 200 yards, providing a practical solution for shooters. The concept leverages bullet drop compensation, allowing precise point-of-aim and point-of-impact alignment, making it effective for both close-range and mid-range engagements while streamlining the sighting-in process.
2.3 Why 10 Yards is a Popular Choice for Zeroing
10 yards is a favored distance for zeroing due to its accessibility and practicality. It offers a balance between convenience and accuracy, allowing shooters to achieve a reliable zero without requiring extensive range access. The compact distance simplifies the sighting-in process, saving time and ammunition. Additionally, a 10-yard zero aligns well with common shooting scenarios, providing effective accuracy for both close-range and mid-range engagements. Its popularity is further boosted by the availability of downloadable PDF targets tailored for this distance.
Benefits of Using the 10 Yard Zero Target
The 10-yard zero target offers accessibility, accuracy, and efficiency. It saves time and ammunition while providing precise zeroing for optimal performance at various distances, making it a practical choice for shooters.
3.1 Convenience and Accessibility
The 10-yard zero target is remarkably convenient, offering shooters an accessible way to zero their optics without requiring long-distance ranges. Its compact design allows for easy setup at nearby shooting facilities or even backyard ranges, making it ideal for those with limited access to extensive shooting areas. The target’s popularity lies in its simplicity and portability, enabling quick adjustments and verifications. This accessibility ensures that shooters can achieve accurate zeroing efficiently, saving both time and resources while maintaining precision.
3.2 Accuracy at Various Distances
The 10-yard zero target ensures exceptional accuracy across multiple distances, making it a versatile tool for shooters. By zeroing at 10 yards, the bullet’s trajectory is optimized for consistent hits at both close and far ranges, such as 50 to 200 yards. This method minimizes bullet drop compensation, allowing for precise shot placement with minimal adjustments. The target’s design enables shooters to achieve tight groups and reliable accuracy, ensuring effective performance in various shooting scenarios and environments.
3.4 Reduced Ammunition and Time Consumption
The 10-yard zero target streamlines the zeroing process, reducing the need for excessive ammunition and time. By achieving an accurate zero at a shorter distance, shooters can fine-tune their optics or iron sights efficiently, minimizing the number of shots required. This method is particularly beneficial for those with limited access to long-range facilities, as it allows for precise adjustments without the need for extended range time, making the process both cost-effective and time-efficient.

Setting Up the 10 Yard Zero Target
Setting up the 10-yard zero target involves placing it at the correct distance, aligning your optic’s point of aim, and ensuring proper range setup and visibility.
4.1 Printing and Preparing the Target
The 10-yard zero target is widely available as a downloadable PDF, ensuring easy access and printing. Print the target on standard paper at 100% scale to maintain accuracy. Ensure the grid lines and aiming points are clear and properly aligned. For durability, laminate the target or print it on sturdy paper. Secure it to a cardboard or wooden backdrop to prevent movement during shooting. Proper preparation guarantees precise zeroing and consistent results at the range.
4.2 Setting Up the Shooting Range
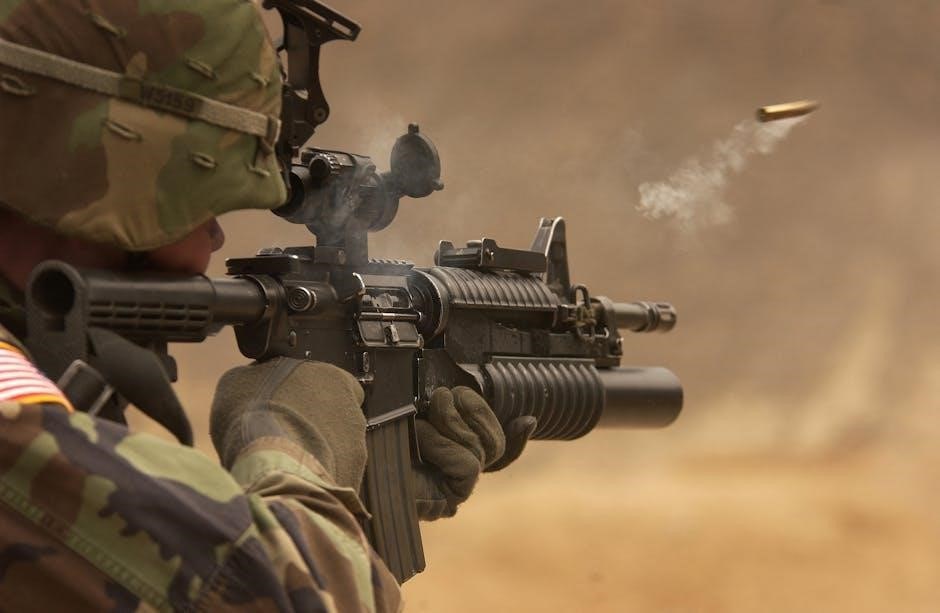
Choose a safe, flat area for shooting, ensuring a stable surface for your firearm. Position the target at exactly 10 yards from your shooting station. Ensure clear visibility and proper lighting to see the target clearly. Use a sturdy backstop to contain rounds and prevent ricochets. Confirm the area behind the target is clear of people. Secure the target firmly to prevent movement during shooting. For added stability, use shooting benches or rests if available. A spotting scope can help analyze shot placement accurately.
4.3 Ensuring Proper Sight Alignment
Proper sight alignment is critical for accurate zeroing. Ensure the front and rear sights are aligned consistently, with the target clearly visible. Position your eye directly behind the optic or iron sights to maintain a consistent sight picture. Adjust your stance to achieve even light distribution around the front sight post. Avoid canting the firearm, as this can throw off accuracy. Proper alignment ensures your point of aim matches the point of impact, crucial for a reliable zero. Consistency in alignment is key to achieving precise results.

The Science Behind the 10 Yard Zero
The 10-yard zero relies on ballistic calculations, ensuring accuracy at extended ranges. It minimizes bullet drop, providing a consistent point of impact from 10 to 200 yards.
5.1 Ballistic Calculations for 10 Yard Zero
Ballistic calculations for a 10-yard zero involve understanding bullet trajectory and MOA adjustments. At 10 yards, 1 MOA equals 1 inch, simplifying sight adjustments. This zero ensures minimal deviation at longer ranges, with bullet drop remaining consistent up to 200 yards. Printable PDF targets with grid systems aid in precise adjustments, allowing shooters to align point of aim and impact effectively. This method maximizes accuracy and efficiency for both practice and tactical scenarios.
5.2 Understanding MOA (Minute of Angle)
A Minute of Angle (MOA) is a unit of measurement equal to 1/60 of a degree, representing approximately 1 inch at 100 yards. For a 10-yard zero, 1 MOA equals 0.1 inches, making it a precise tool for adjusting sights. MOA calculations help shooters understand bullet trajectory and impact deviation, ensuring accurate adjustments. Printable PDF targets often include MOA-based grids, simplifying the zeroing process and enhancing shooting precision at various distances, from 10 to 200 yards.
5.3 How Point of Aim and Point of Impact Relate
The Point of Aim (POA) is where the shooter aligns the optic or sights, while the Point of Impact (POI) is where the bullet strikes the target. At 10 yards, achieving a precise alignment between POA and POI is crucial for accuracy. Printable PDF targets, like the 10-yard zero target, feature grids and reference points to help shooters adjust their optics or sights, ensuring that POA and POI coincide. This alignment is essential for maintaining consistency and accuracy across various shooting distances, from close-range to 200 yards.
Choosing the Right Optic for 10 Yard Zero
Red dot optics are ideal for 10-yard zeroing due to their parallax-free design and quick target acquisition. Optic height over bore and MOA adjustments are critical for accuracy.
6.1 Red Dot Optics and Their Suitability
Red dot optics are highly suitable for 10-yard zeroing due to their parallax-free design and rapid target acquisition. These optics excel in close-quarters and medium-range shooting, offering crisp dot clarity. Their compact size and lightweight construction make them ideal for rifles and handguns. Red dots like the Trijicon RMR are popular choices, providing precise point-of-aim alignment with point-of-impact, ensuring accuracy at 10 yards and beyond. They are user-friendly and durable, making them a top pick for shooters seeking reliability and performance.
6.2 Scope Height Over Bore Considerations
Scope height over bore significantly impacts bullet trajectory and zeroing accuracy. A higher scope increases the disparity between point of aim and point of impact, especially at longer ranges. Proper alignment ensures bullets strike targets consistently, with adjustments needed for optimal accuracy. Shooters must account for scope height when zeroing at 10 yards, as it affects bullet drop compensation at extended distances. Using a bore sight and verifying with live fire helps refine this critical setup for precise results.
6.3 Adjusting for Optic-Specific Zeroing
Optic-specific zeroing requires precise adjustments to align point of impact with point of aim. Use MOA adjustments to fine-tune elevation and windage, ensuring alignment at 10 yards. Red dot optics and scopes may differ in click values, so consult the manufacturer’s specifications. Proper alignment ensures consistent accuracy across distances, making it essential for both close and long-range shooting scenarios. Verify zero at longer distances to confirm optic-specific adjustments are accurate and reliable for optimal performance. This step ensures reliability in various shooting conditions and setups.

Step-by-Step Guide to Zeroing at 10 Yards
- Place the target at 10 yards from your shooting position.
- Aim carefully, focusing on the center of the target.
- Fire a shot and observe where it impacts the target.
- Adjust your optic or sights based on the shot placement.
- Repeat until point of impact matches point of aim.
- Verify accuracy at longer distances to confirm zero.
7.1 Placing the Target at 10 Yards
Position the 10-yard zero target at exactly 10 yards from your shooting station. Ensure the target is centered and securely placed to avoid movement during the zeroing process. Align your optic or iron sights with the target’s center, focusing on the designated point of aim. The target’s design, often featuring grids or dots, will help you accurately gauge your shot placement. Proper alignment and distance are critical for achieving an accurate zero. Always double-check the target’s placement before firing.
7.2 Aiming and Firing the First Shot
Align your optic or iron sights with the center of the 10-yard target, focusing on the designated point of aim. Take a steady position, control your breathing, and squeeze the trigger smoothly to avoid movement. Fire the first shot, ensuring minimal flinch or disruption. The impact point will serve as a baseline for adjustments. Note the shot’s placement relative to the target’s grid or dots to assess accuracy and guide subsequent corrections.
7.3 Adjusting Sights Based on Impact
After firing the first shot, inspect the target to determine where the bullet impacted. Use the target’s grid or dots to measure the deviation from your point of aim. Adjust your optic or iron sights accordingly, making precise clicks for windage (left/right) and elevation (up/down). For example, if the impact is 1 MOA high at 10 yards, lower your aim by the equivalent number of clicks. Verify adjustments by firing another shot to ensure accuracy.
7.4 Verifying Zero at Longer Distances
Once the 10-yard zero is confirmed, move the target to 50 yards to verify accuracy. Fire a group to ensure bullets impact within the expected range, typically 1-2 inches above or below the point of aim. Repeat at 100 or 200 yards to confirm the ballistic consistency. This step ensures the zero holds at extended ranges, providing confidence in the rifle’s accuracy for real-world applications or competitions. Adjustments may be needed if impact deviates significantly from expectations.

Best Practices for Using the 10 Yard Zero Target
Ensure consistent shooting technique, regularly verify zero accuracy, and account for environmental factors like lighting and wind. These practices optimize the effectiveness of the 10-yard zero target.
8.1 Consistency in Shooting Technique
Consistency in shooting technique is critical for accurate zeroing at 10 yards. Maintain a steady stance, firm grip, and controlled breathing to ensure repeatable shot placement. Align your optic or iron sights precisely with the target, focusing on a consistent trigger pull and follow-through. Avoid flinching or altering your position mid-shot, as this can disrupt accuracy. By maintaining a uniform technique, you ensure reliable results when verifying your zero at longer distances, making the 10-yard zero target an effective tool for precision shooting.
8.2 Regular Verification of Zero
Regular verification of zero ensures consistent accuracy over time. Environmental factors, optic adjustments, or weapon handling can shift your zero. After initial setup at 10 yards, periodically recheck your aim at longer distances like 50 yards. Use the same target or a verified long-range target to confirm accuracy. Consistent shooting technique and proper equipment maintenance are crucial for reliable results. Regular checks help maintain precision and adapt to any changes in your setup or conditions.
8.3 Environment and Lighting Considerations
Environmental factors and lighting conditions can significantly impact shooting accuracy. Bright sunlight, shadows, or low-light scenarios may alter your perception of the target. Ensure consistent lighting when zeroing to avoid discrepancies. Wind and temperature variations can also affect bullet trajectory, especially at longer ranges. Always consider these factors during practice and adjust your technique accordingly to maintain precision and reliability with your 10-yard zero setup.

Common Mistakes to Avoid
Common mistakes include improper sight alignment, failure to verify zero at longer distances, and ignoring environmental factors like wind and lighting conditions, which can affect accuracy.
9.1 Incorrect Sight Alignment
Incorrect sight alignment is a common mistake that can significantly affect accuracy. Ensure the reticle or dot aligns perfectly with the target to avoid misaligned shots. Misalignment leads to inconsistent impact points, requiring costly adjustments. Always verify proper alignment before firing to maintain precision and achieve an accurate zero. This fundamental error can be prevented by careful attention to optic setup and shooter posture, ensuring the point of aim matches the point of impact.
9.2 Insufficient Verification at Longer Distances
One common mistake is failing to verify the zero at longer distances after setting it at 10 yards. This oversight can lead to inaccuracies, as bullet drop and windage may vary significantly beyond the initial range. Always test your zero at 50 or 200 yards to ensure consistency and accuracy. Neglecting this step can result in missed targets and poor performance in real-world scenarios, emphasizing the importance of thorough verification for reliable results.
9.3 Ignoring Environmental Factors
Environmental conditions like wind, lighting, and temperature can significantly impact bullet trajectory and accuracy. Ignoring these factors during zeroing can lead to inconsistent results. Shooters must account for windage adjustments and lighting variations that might affect optic clarity. Temperature changes can also alter bullet drop, especially at longer distances. Failing to consider these elements can result in missed targets and poor performance, making it crucial to adapt to environmental conditions for precise and reliable shooting outcomes.

Advanced Techniques for Zeroing
Advanced zeroing involves using laser tools for precise alignment and incorporating windage/elevation adjustments. Ballistic calculations ensure accuracy, while customizable targets optimize results for specific scenarios and distances.
10.1 Using Laser Tools for Precision
Laser tools enhance zeroing precision by providing rapid, accurate alignment. Boresight lasers align the barrel with optics, ensuring consistency. These tools reduce human error, offering precise point-of-impact adjustments. They are ideal for shooters seeking optimal accuracy at 10 yards and beyond, streamlining the zeroing process for both beginners and experienced marksmen. By integrating laser technology, shooters achieve faster, more reliable results, making it a valuable asset in modern shooting techniques.
10.2 Incorporating Windage and Elevation Adjustments
Windage and elevation adjustments are critical for precise zeroing. At 10 yards, shooters can make fine-tuned adjustments to align the optic’s point of aim with the bullet’s impact. Using the target’s grid lines, shooters can measure and correct deviations, ensuring accuracy. These adjustments are essential for achieving a reliable zero, as they account for the rifle’s ballistic profile. Properly calibrated windage and elevation settings ensure consistent accuracy, whether shooting at 10 yards or extending to 200 yards, making the 10-yard zero highly effective for various scenarios.
10.3 Advanced Ballistic Calculations
Advanced ballistic calculations refine the 10-yard zero by accounting for bullet drop and trajectory. shooters use MOA adjustments to align point of aim and impact, ensuring accuracy at extended ranges. specialized targets, like those from Jerking the Trigger, aid in precise calculations, allowing shooters to achieve a 50/200-yard zero from a 10-yard setup. These calculations enhance shooting performance by optimizing bullet placement across various distances, making the 10-yard zero a versatile and efficient choice for both practice and tactical scenarios.

Printable 10 Yard Zero Target Options
Printable 10-yard zero targets are widely available as PDFs, offering customizable designs for specific optics and rifles. They enable precise zeroing and are easily downloadable from sources like Jerking the Trigger.
11.1 Downloading the PDF Target
Downloading a 10-yard zero target in PDF format is straightforward. Websites like Jerking the Trigger offer free downloadable targets specifically designed for AR-15s and other rifles. These PDFs are calibrated for precise zeroing, with grid lines and dots spaced 1 MOA apart. Simply print the target on standard paper, ensuring the scale is accurate. This convenient option saves time and ammunition, allowing shooters to achieve a reliable 50/200-yard zero from a 10-yard setup. The downloadable nature makes it accessible for shooters of all skill levels.
11.2 Customizing the Target for Specific Needs
Customizing the 10-yard zero target allows shooters to tailor it to their specific requirements. Users can adjust grid sizes, add custom reticles, or modify the layout to suit different optics or rifles. Some PDFs offer versions calibrated for 50, 200, or 300-yard zeros, ensuring versatility. Shooters can also add notes or markings for windage and elevation adjustments. This flexibility makes the target adaptable to various shooting scenarios, enhancing its practicality for both practice and precise zeroing at different distances.
11.3 Alternative Targets for Different Scenarios
Beyond the standard 10-yard zero target, shooters can explore alternative designs tailored to specific needs. For example, 25-yard and 50-yard zero targets are available for those preferring longer ranges. Some PDFs offer targets calibrated for 100-yard zeros, ensuring accuracy at extended distances. Additionally, targets designed for specific rifles, like the AK-47 or AR-15, cater to unique ballistic requirements. These alternatives provide flexibility, allowing shooters to choose the best option for their firearm and shooting environment, ensuring optimal performance in various scenarios.
The 10-yard zero target is a versatile and efficient tool for achieving accurate rifle sightings. It ensures reliability up to 200 yards, making it ideal for various shooting scenarios. Always verify your zero at longer distances if possible for optimal performance. Regular practice and proper target use will enhance your shooting precision and confidence.
12.1 Summary of Benefits
The 10-yard zero target offers unmatched convenience, enabling shooters to achieve precise sightings efficiently. It ensures accuracy at various distances, reducing the need for extensive range adjustments. By minimizing ammunition and time consumption, this target is ideal for both novice and experienced shooters. Its versatility allows customization for specific firearm setups, making it a practical choice for diverse shooting scenarios. The ability to print and use it instantly adds to its appeal, ensuring consistent and reliable zeroing results every time.
12.2 Final Tips for Successful Zeroing
Consistency in shooting technique and regular verification of zero are crucial for maintaining accuracy. Always consider environmental factors like wind and lighting, as they can affect results. Use the 10-yard target to fine-tune your optic setup, ensuring precise alignment. After zeroing, verify accuracy at longer distances to confirm reliability. Properly adjusting for point of impact and aligning your optic with the target will yield the best outcomes; This method ensures a quick, efficient, and accurate zeroing process for any shooter.


Leave a Reply
You must be logged in to post a comment.